By Mike Idacavage, vice president of business development, Colorado Photopolymer Solutions

Over the past two or three years, one topic has seemed to stand out in the RadTech universe. Whether it is at the biennial RadTech conference, uv.eb WEST or even this publication, it wont be long before one sees a reference to 3D printing. As the initial UV+EB Technology column focused on 3D printing, let’s consider what we mean by 3D printing and why it is of interest to the RadTech community.
Understanding the types of 3D printing
3D printing is the building of an object by adding successive layers of the desired starting material. The data source for the information is usually a computer file. The different layers can be reacted in place or the physical form changed to create the object. Another name for 3D printing is additive manufacturing – the reason for which is understood, given the definition of 3D printing mentioned above. While there are no hard and fast rules, 3D printing usually refers to the making of single items and prototypes, while additive manufacturing tends to refer to the production of many items on a commercial scale.
3D printing seems to be everywhere. It is a challenge to spend time online or reading publications without seeing a reference to this technology. Is the opportunity for UV curing in 3D printing this large? The qualified answer to this question should be a “no.” While we tend to view the world through UV-colored glasses, most printers do not use UV curing as the key technology. A wide range of 3D printing technologies is available, and UV curing is but one approach. For this overview, I will focus on four major types.
- Perhaps the most common technology used for 3D printing is Fused Deposition Modeling (FDM). This is basically melting and then extruding a material to form the object. Materials commonly used are thermoplastics, clays, metals and even foodstuffs.
- A second common technology is Selective Laser Sintering (SLS). The idea behind this method is that a powder can be applied in a layer, then melted to form the 3D object. Materials commonly used are plastic, metals and ceramic powders.
- Another technology that can be used is Laminated Object Manufacturing (LOM). Layers of thin sheets are fused together using heat and pressure, and then cut into the desired shape. Materials commonly used in LOM are paper, metal foil and plastic film.
- The final major technology in this overview is UV curing. Materials commonly used are acrylates, methacrylates and cycloaliphatic epoxides.
UV-curable 3D printing
The earliest form of UV-curable 3D printing technology is stereolithography or SLA. The first step is to develop a 3D image of the object using computer-aided design (CAD) drawings. The image then is cut into flat slices so that the 3D object now is a stack of thin slices. In this technique, a UV laser is used to draw an image slice on the surface of the liquid resin. Upon exposure to the UV, the region where the laser is focused will cure. The laser then moves to an adjacent area and cures the next small region of resin. Once the entire initial image slice is hardened, the slice of solid resin is lowered slightly under the surface of the liquid resin and the sequence restarted. During the process to form the next layer, the top layer bonds to the layer below, resulting in a solid object. In this way, the shape of the 3D object is built up over time. Some SLA printers work in reverse, with the laser entering from below the surface of the resin and the object slowly being raised as it is formed. Of course, in this case, the resin container must be transparent to the UV laser.
Instead of laser imaging a single point in the resin bath, the entire 2D slice can be imaged at once. This is achieved by using a common Digital Light Projector. This method of 3D printing is referred to as DLP. Like the use of a projector to show a photo or presentation on a screen, each layer now serves as an entire 2D image that is projected on the surface of the resin. Once the entire plane is cured, the image is lowered, and the next plane is projected on the resin. This second layer will bond to the first. As each layer is projected on the resin, the entire 3D object is slowly built up.
In this method of 3D printing, a common commercial DLP projector used for business and home viewing is usually used as the light projector source. In most cases, the output from the DLP projector should be UV to initiate the polymerization of the resin. A DLP projector with an output of visible light could work but would require large adjustments in the resin formulation and would be more difficult to work with due to the ambient light in the printer area.
Historical reference
The third major UV-curable 3D printing technology is quite a different approach to either SLA or DLP. This technology is based on the well-known 2D inkjet printer that is used for printing. Instead of printing an image on a piece of paper, a 3D object is slowly built up by jetting a small drop on the image plate and then curing the drop using UV. In a manner like using a home inkjet printer, the printer head is moved to the next location, and the process is repeated. When the entire image slice is printed, the print head will then jet a drop on top of a previously imaged area and cure the new drop. In this way, the object will slowly build up to its final form. In an analogy to building a brick house, each cured drop of “micro brick” is added, one at a time, to eventually create the object. By switching to a new print head, different colors of resins can be used to build multicolor objects. Additional print heads also can be used to form easily removable supports for the object during the build. The typical support material is a low-melting wax. Once the object has been built, the wax supports can be removed easily with heat or solvents.
While it might seem to be a recent development, 3D printing using UV-curable chemistry has been around for quite some time. The first use of UV-curable chemistry in 3D printing was in stereolithography. Chuck Hall is credited as the founder of this process, as he did his initial work in the mid-1980s and was first to file for a patent in 1986. 3D Systems took this technology and made it commercial by releasing the first SLA printer in 1987.
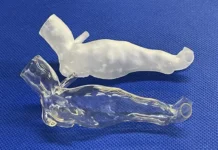
An interesting early application of SLA technology was the creation of medical models by Dr. Doug Neckers in 1988. Neckers would convert a CAT scan image of a patient and then create a 3D model for the physician to use in developing the strategy for surgery. One unique use of this technique was the creation of a model of a person based on the scans of an Egyptian mummy.
Objet Geometries in Israel introduced a 3D inkjet printer that deposited and cured UV resins in a 3D version of the standard inkjet printer. This was followed by the introduction of DLP technology to project an image on a resin formulation and build up the object through successive image layers.
Up to about 2005, the resins used by UV-curable 3D printers were limited to the base properties that result from curing standard UV-curable materials. DSM SOMOS opened the field in 2005 with the introduction of a wide variety of performance resins. Flame retardance, high-temperature resistance and the use of nanocomposites illustrate some of the ways the resin performance was enhanced. This work continues today, with a wide variety of research being done to push the performance of the UV-cured resins used in 3D printing.


